How to Setup BigBlueButton HTML5 Version on AWS EC2

Minimum server requirements
The minimum requirements for a BigBlueButton server are
- Ubuntu 16.04 64-bit OS running Linux kernel 4.x
- 4/8 GB of memory with swap enabled (16 GB of memory is better)
- 2/4 CPU cores (8 is better)
- TCP ports 80 and 443 are accessible
- UDP ports 16384 - 32768 are accessible
- Port 80 is not in use by another application
- 500G of free disk space (or more) for recordings
- 250 Mbits/sec bandwidth (symmetrical) or more
- Dedicated (bare metal) hardware
- A hostname (such as bbb.example.com) for the setup of an SSL certificate
- IPV4 and IPV6 address
After successful setup, Aws Ec2 connect your PEM file
Connect pem file with AWS ec2
- Command Prompt has administrator permission.
Change root directory
Install BigBlueButton in 15 minutes
wget -qO- https://ubuntu.bigbluebutton.org/bbb-install.sh | bash -s -- -w -a -v xenial-22 -s yourdomain.com
After successful setup BigBlueButton
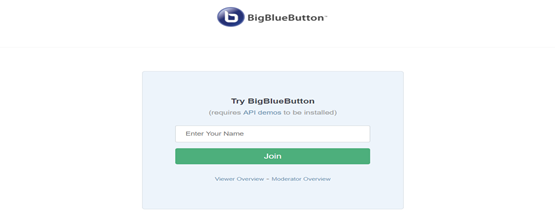
Check BigBlueButton on the browser
Configure Nginx to use HTTPS
Depending on your certificate authority (CA), you should now have 2 or more files, as follows:
- Certificate
- Private key
The next step is to install the files on the server.
- Create the directory /etc/nginx/ssl:
- $ sudo mkdir /etc/nginx/ssl
Now you can edit the Nginx configuration to use SSL. Edit the file /etc/Nginx/sites-available/bigbluebutton to add the marked lines. Ensure that you’re using the correct filenames to match the certificate and key files you created above.
- $ sudo nano bigbluebutton
After add SSL certificate & private key run the below command:
- $ sudo service Nginx reload
Configure Free SWITCH for using SSL
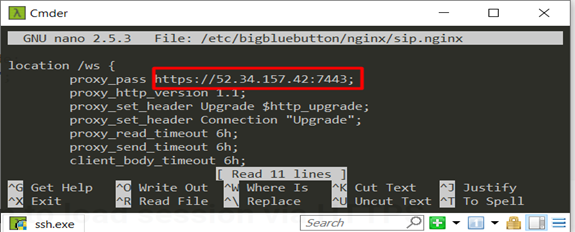
Edit the file /etc/bigbluebutton/nginx/sip.nginx and change the protocol and port on the proxy_pass line as shown:

Configure BigBlueButton to load session via
HTTPS
With Nginx now configured to use SSL, the next step is to configure FreeSWITCH to use HTTPS for initiating an audio connection.
Edit /usr/share/bbb-web/WEB-INF/classes/bigbluebutton.properties and update the property bigbluebutton.web.serverURL to use HTTPS:

Next, edit the file /usr/share/red5/webapps/screenshare/WEB-INF/screenshare.properties and update the property jnlpUrl and jnlpFile to HTTPS:
You must also update the file /var/www/bigbluebutton/client/conf/config.xml to tell the BigBlueButton client to load components via HTTPS. You can do the update with a single command
sudo sed -e 's|http://|https://|g' -i /var/www/bigbluebutton/client/conf/config.xml
Open /usr/share/meteor/bundle/programs/server/assets/app/config/settings.yml editing and change:

Next, modify the creation of recordings so they are served via HTTPS. Edit /usr/local/bigbluebutton/core/scripts/bigbluebutton.yml and change the value for playback_protocol as follows:

If you have installed the API demos edit /var/lib/tomcat7/webapps/demo/bbb_api_conf.jsp and change the value of BigBlueButtonURL use HTTPS.
Finally, to apply all of the configuration changes made, you must restart all components of BigBlueButton:
$ sudo bbb-conf –restart
If you face an audio issue (could not make a WebSocket connection) follow the instruction below:
edit /opt/freeswitch/conf/sip_profiles/external.xml and ensure the value for wss-binding uses the external IP address
<param name="wss-binding" value="EXTERNAL_IP_ADDRESS:7443"/>
At this point, restart your BigBlueButton server with bbb-conf --restart, then try connecting to the WebRTC media again.
If you face a media issue (media could not reach the server) follow the instruction below:
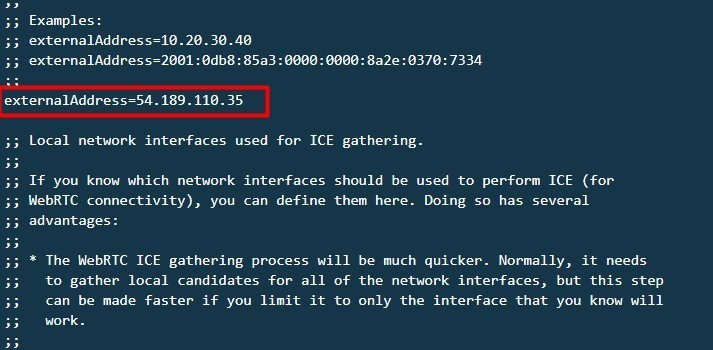
/etc/kurento/modules/kurento/WebRtcEndpoint.conf.ini
Run this command with sudo and comment out the external address and put in your ec2 public IP.


Restart your BigBlueButton server with the command "sudo bbb-conf --restart".


